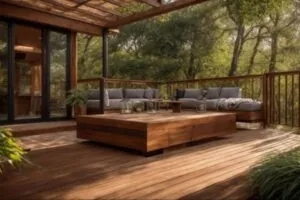
Picture this: a gentle breeze whispering through lush greenery, the soothing hum of nature, and the warm glow of the setting sun painting the sky in hues of pink and orange. Now, imagine experiencing this serene moment from the comfort of your very own screened-in porch—a haven where the outdoors and indoors seamlessly dance together, creating a space that invites relaxation and connection.
If you’ve ever dreamt of transforming your ordinary porch into a tranquil retreat, you’re in for a treat. Our step-by-step guide is here to usher you through the exciting journey of building a screened-in porch, where every nail, every board, and every decision is a brushstroke on the canvas of your oasis. From the initial spark of inspiration to the final sip of coffee enjoyed in your new haven, we’re here to guide you through the process with expert tips, creative insights, and a dash of inspiration.
So, grab your tool belt and join us as we embark on this adventure together. Your dream screened-in porch awaits, and we’re here to help you turn that dream into a tangible, inviting reality. Let’s build more than just a porch; let’s craft an escape, a place where memories are made, and tranquility becomes a part of your everyday life.
Step 1: Planning Your Screened-In Porch

Start your project by determining the size of your screened-in porch. Consider how much space you need for lounging, dining, and entertaining. Once you’ve got a clear idea, sketch out a basic floor plan or find screen porch plans online that suit your needs.
Make sure to account for enough room to move around furniture and guests comfortably.
Select the location where your screened-in porch will be built. A spot with good natural light and views can enhance the ambiance of your simple screened-in deck but remember to think about privacy too.
Check local building codes to ensure compliance with regulations related to structures like yours before moving forward. Your next step will involve designing the dream porch that fits seamlessly with your home’s style and aesthetics, leading into “Step 2: Designing Your Dream Porch.”.
You might like: 5 Benefits Of A Front Porch Addition To Your Home
Step 2: Designing Your Dream Porch
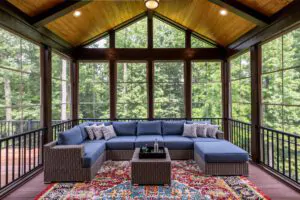
After mapping out your plan, it’s time to bring the vision of your screened-in porch to life. Begin by choosing a style that complements your home’s architecture. Consider different roof styles and materials that will blend seamlessly with your existing structure.
You’ll want to decide on the size and shape of the porch as well—make sure it’s spacious enough for comfortable seating and movement but also proportionate to your house.
Select durable flooring options like tile or hardwood that withstand foot traffic and weather elements while still looking chic. Think about screen materials too; they should provide ample ventilation while keeping bugs and mosquitos at bay. The most common screening materials are fiberglass screens, screen fabric, and aluminum screens.
For extra charm, incorporate unique features such as a swinging bench or ceiling fans. These details will make your simple screen in porch not just functional but also a cozy extension of living space where you’ll love spending time.
Step 3: Hiring the Right Professionals

Choosing skilled professionals is crucial when you’re ready to build a screened-in porch. Look for contractors with experience in building outdoor structures and check their references carefully.
They should have a portfolio of completed porches that you can review. This helps ensure they can deliver the quality and design you want.
Make sure the team you hire is licensed and insured, protecting both their workers and your property during construction. Discuss your project in detail with them, making clear your expectations for time frame, budget, and communication throughout the building process.
An expert crew will take care of all the heavy lifting and technical aspects, leaving you free to focus on watching your dream porch come to life.
Step 4: Preparing the Porch Floor
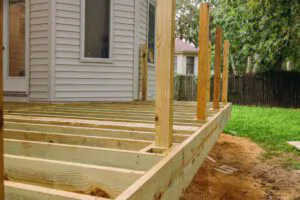
Before construction begins, clear the site of any debris and vegetation. Level the ground to ensure a sturdy foundation for your screened-in porch. Lay down gravel or sand to create a stable base and prevent future shifting.
Then, mark out the area where your porch will be built using stakes and string. Lastly, check with local authorities for any necessary permits before proceeding.
Now that the site is prepared, it’s time to move on to Step 5: Construction Process.
Related Post: What Is The Difference Between A Porch And A Deck?
Step 5: Construction Process

Prepare the construction site by clearing any debris and ensuring a level surface. Begin building the porch frame, ensuring it aligns with your design plans. Install the beams, joists, and decking according to local building codes.
Once the structure is in place, attach the screen panels securely. Then, add the roof to protect it from the elements. Finally, finish off with trim work and any additional features you desire for your perfect screened-in porch.
Assemble materials based on your design plan before commencing construction. Start by positioning support columns or posts in their designated spots as per your layout specifications.
Ensure each piece of lumber is cut accurately to maintain structural integrity throughout the construction process.
Step 6: Adding Finishing Touches
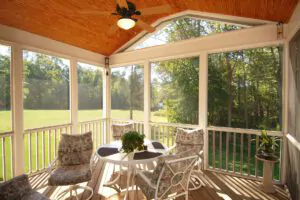
Once the construction is completed, it’s time to add those final touches that will make your screened-in porch feel like a true extension of your home. Start by choosing the right furniture and decor that complements the style and function of your porch.
Consider adding outdoor rugs, throw pillows, and lighting to create a cozy atmosphere. Additionally, you can incorporate potted plants or hanging baskets to bring a touch of nature into your space.
Furthermore, consider adding protective elements such as screens or curtains to keep bugs at bay while allowing for airflow. Lastly, ensure that all surfaces are properly sealed and finished to withstand exposure to the elements over time.
Step 7: Ensuring Long-Term Durability
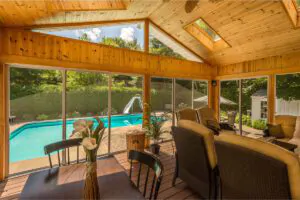
After adding the finishing touches to your screened-in porch, it’s crucial to focus on ensuring its long-term durability. Protecting your investment means using high-quality materials that can withstand the elements over time.
Proper maintenance such as regular cleaning and inspection will help prevent any potential issues from developing and ensure that your screened-in porch remains a comfortable and inviting outdoor space for years to come.
Regularly inspecting the structure, addressing any wear and tear promptly, and performing necessary repairs will help maintain the integrity of your screened-in porch.
To further enhance long-term durability, consider applying protective coatings or sealants to vulnerable areas like wood surfaces. Additionally, installing weather-resistant fixtures and fittings can contribute greatly to safeguarding your screened-in porch against deterioration caused by exposure to the elements.
By taking these proactive measures now, you’ll be able to enjoy your beautiful screened-in porch for many seasons without having to worry about premature wear or damage.
Conclusion
You’ve now learned the essential steps to build a stunning screened-in porch. You can confidently plan and design your dream porch with the practical tips provided. By hiring the right professionals, preparing the site, and understanding the construction process, you ensure an efficient project.
The next time you need help in building your screened-in porch, call the pros at All Pro Cape May Deck Builders! We always strive to get you the best screened-in porch that you and your house deserve. We can provide quotes and estimates and can even give you advice on the best layout fitting for your porch.
Your new space will enhance your lifestyle while adding value to your home for years to come. Go ahead and create a beautiful outdoor retreat that you’ll enjoy for many seasons.
FAQs for Building a Screened-In Porch
How to Build a Simple Screened-In Porch?
Building a simple screened-in porch starts with careful planning. Begin by deciding on the size, location, and layout that fits your home’s style and your intended use. Once the plan is ready, prepare the site by clearing away debris and leveling the ground to create a stable base. Construction begins with building a sturdy frame, which includes installing support columns, beams, and joists. After the frame is complete, securely attach the screens and add a roof to protect the porch from the elements. Finally, add finishing touches like furniture, lighting, rugs, and potted plants to create a cozy, inviting space. By following these steps, you can craft a beautiful screened-in porch to enjoy year-round.
Do I Need a Foundation for a Screened-In Porch?
Yes, a foundation is essential for a screened-in porch to ensure it is stable, durable, and safe. The type of foundation you need depends on the size and design of your porch. For long-term use, a concrete slab foundation is an excellent choice as it provides a solid, low-maintenance base. If your porch is elevated or the terrain is uneven, a deck-like foundation with beams and joists may be more appropriate. For simpler or temporary porches, a gravel or sand base can offer stability and prevent shifting. Whatever foundation you choose, ensuring it is well-constructed will extend the life of your screened-in porch.
What Type of Wood Should I Use for a Screened-In Porch?
The type of wood you choose for a screened-in porch should be durable, weather-resistant, and easy to maintain. Pressure-treated lumber is a popular choice due to its affordability and resistance to rot and insects. Cedar is another excellent option, known for its natural resistance to decay and pests, as well as its rich appearance. Redwood offers similar benefits with added durability and aesthetic appeal, though it tends to be more expensive. Alternatively, composite materials can mimic the look of wood while requiring less maintenance and providing superior resistance to moisture and weather damage. Selecting the right wood for your porch depends on your budget, preferences, and local climate conditions.

